My favorite part of car camping is experimenting with new pie iron recipes. Over the last several years we’ve had the opportunity to test out and invent a lot of recipes! Some of these are popular recipes you have likely seen elsewhere, but some should be totally new! A lot of these recipes used canned ingredients, but you could certainly use homemade or fresh versions. I hope they will inspire you in your own experiments to find a new family camping favorite!

General Pie Iron Tips
- Initial Investment: We use these pie irons from Amazon. They are $14 each, which makes them an investment when you’re looking at buying one for each person, so to start we just bought two and made food in shifts. Once we realized how much we enjoyed them, we bought another two.
- Seasoning: Like any cast iron pan, these are great nonstick baking surfaces once well seasoned or a sticky nightmare if not. We spray them heavily with cooking spray before each use (spraying well away from the tent). Pam makes a high heat grill spray that works particularly well.
- Transportation: Since we season them heavily for each item cooked, they are covered in messy oil and will mark up anything they brush against. For transport in the car, we spent years wrapping up the cast iron section in foil until we found these $5 adorable carrying bags for them at REI this weekend!
- Eggs: Many of the recipes we use call for eggs. We have brought eggs in their carton, brought eggs in plastic camping egg containers, but my favorite method is to bring the liquid eggs that they sell at the grocery store. No dealing with shells, no having to beat the eggs into an even consistency, and best of all no worries about the transport!
- Preheat: We discovered that preheating the pie irons over the fire while we work on ingredient prep dramatically reduces the cooking time. We take the two pieces apart and let each half of the pie iron sit on top of the fire grill for maximum preheating!
- Pie irons require a campfire: Obvious, I know, but something to consider when you decide on your menu plan for the trip. Lunch pie iron recipes aren’t usually very realistic given the amount of time it takes for a campfire to become a good cooking campfire. The cost of firewood should also be factored into your meal. Since it’s not uncommon to see campgrounds with $7 small bundles of firewood, don’t forget to factor in the cost of your cooking fire in your meal planning.
- Salt and pepper: I bought an inexpensive salt and pepper set to stick in our camping box after thinking how much better a dish would have been with salt and pepper one too many times. They are too easy to forget to not just tuck some dedicated salt and pepper into your camping supplies!

Breakfast Pie Iron Recipes
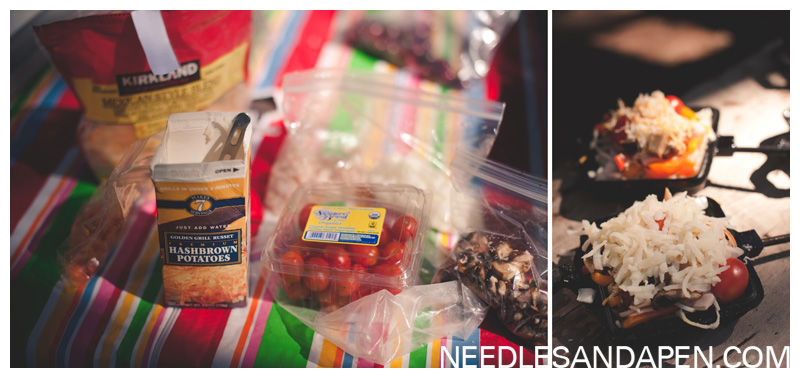
Loaded Hashbrowns: These with an omelet were our go-to breakfast this summer because they are yummy, filling, and work really well to use up leftovers from the dinner pie iron recipes. Even better, before you use them they can be an additional icepack in your cooler! Use packaged frozen hashbrowns and add whatever extras you have on hand or would like to bring. Some of our favorite things to add: tomatoes, onion, shredded cheese, green chiles, bacon bits, chopped up lunch meat (honey turkey breast is really good in these), etc. TIP: The hashbrowns badly want to stick to the cast iron, so season the pie irons especially carefully before each one you make!
Omelets: These follow the same recipe as the loaded hashbrowns, but you swap out liquid egg (or actual beaten eggs) for the frozen hashbrowns. Some of our favorite things to add: chopped baby spinach, onions, tomatoes, shredded cheese, green chiles, bacon bits, lunch meat, ground beef (leftover taco seasoned ground beef from burritos or walking tacos is surprisingly good in these). TIP: Don’t fill the pie iron too full with liquid egg. Not only will it spill as you try to carefully hold it perfectly level from your prepping area to the fire, but the egg will expand in the pie iron as it cooks and try to leak out all over the place. I find that filling the bottom pie iron pie half full of liquid egg and then adding toppings is just about the perfect amount.
The hashbrown/omelet combo: Instead of making the loaded hashbrowns and omelets separately, you add the egg, hashbrown, and toppings in one pie iron. The downside is that since it’s a small space, you can’t fit very much in.
Eggs, Bacon, Texas Toast: This requires that you bring actual eggs, but they are so good that it’s worth a try. These little sandwiches required a lot of tweaking as I tried to invent them, but eventually I figured out a formula that works. You lay bacon slightly overlapping on the pie iron to make a perfect bacon bowl and then crack an egg so that it lays on top of the bacon layer. Season the egg with salt and pepper. Lay a piece of bread on top, then the second piece of the pie iron and seal it up. The bacon crisps enough to act as the second piece of bread in this breakfast sandwich, and its grease drips down onto your actual bread until it is like texas toast.
Egg McMuffin: Repeat the above but with an English muffin instead of bread. Less fun but less messy, you can cook liquid egg in a pie iron, warm English muffins in another pie iron or on the grill, and cook the bacon in another pie iron and assemble on the place.
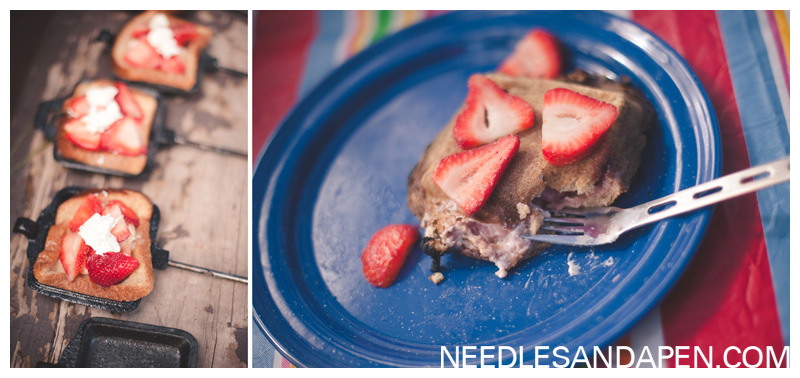
Stuffed French Toast: Stuffed French toast goes down as the most dangerous thing we have cooked in the pie irons. The egg and sugar made for a combination that exploded when Nic went to peak on them to see if they were done. Luckily the filling exploded onto his pants and not his face, however since that was the camping trip where we were closest to a bear ‘lucky’ is maybe not the best word. So, if you want to take a chance on this delicious but deadly breakfast, don’t stuff the French toast too full and be very careful when you open the pie irons. For the French toast: place liquid egg, milk (taking a tiny lunch sized bottle or carton of milk works well) and sugar in a ziplock bag [I know people like measurements, but that’s not how I roll–just do what feels right] and then one at a time place a piece of bread in the bag and shake it around so that it soaks up the mixture. Place one piece of bread on top of one side of the pie iron and then spread the filling on top. Place another piece of soaked bread on top of the filling and then close it up in the pie iron. For the filling: Combine cream cheese, sugar, and sliced strawberries. Mixing this up before you leave home is a nice treat to your future self.
Cinnamon Rolls: Pie irons cook up those Pillsbury in-a-roll cinnamon rolls beautifully! I like to put two in each pie iron and then put the frosting on cooking. (I tried sandwiching the filling between two uncooked cinnamon rolls but it didn’t work.)

Lunch and Dinner Pie Iron Recipes
Pizzas: This is the most common pie iron recipe, but deserves to be mentioned anyway. Make sandwiches out of bread, pizza sauce, shredded mozzarella, and the toppings of your choice (we usually do a pepperoni/green chili/black olive set and then a canned pineapple and Canadian bacon set) and stick them in the pie irons. You can mix that up by using premade pizza dough in a can instead of bread, but I actually prefer the pizza bread sandwiches to the pizza dough sandwiches and as an added bonus they are easier to assemble with bread than dough. Tip: Walmart sells a bunch of cool and easily transportable pizza toppings and sauces in sizes perfect for pie iron pizzas. I usually can’t find the mini Canadian bacon slices at my regular grocery store.)
Artichoke Dip on Rye: I invented this as a fancy pie iron appetizer but it quickly became dinner since it is rich and filling. It is two pieces of rye with homemade artichoke dip in the middle that you cook in the pie irons until the cheese melts and the rye bread gets toasty. I make my artichoke dip at home ahead of time with my usual no-measurement style, mix it together and then pop it in a ziplock bag and into the freezer [so it can pull double duty as ingredient/ice pack). Cream cheese, mayonnaise (roughly 2/3 cream cheese, 1/3 mayo), the better part of a package of shredded parmesan cheese, a clove or two of garlic minced or chopped depending on your level of garlic snootiness, a pinch of red pepper, 1-2 cans of artichoke hearts chopped and maybe a can of green chiles if you feel like it that day and remembered to get them at the store.
Burritos: Use a whole wheat tortilla and assemble burritos roughly the size of the pie irons. The tortillas toast really nicely in the pie irons and the fillings tie in well with the omelet and hashbrowns. Suggesting fillings: refried beans, black beans, cheese, avocado, olives, shredded chicken, ground beef seasoned with taco seasoning, tomatoes. Suggested toppings: lettuce, sour cream, salsa.
Chicken Pot Pie: In this one you use canned dough to create a pocket around a homestyle chunky chicken and veggies canned soup. You’ll need a bowl and a spoon for this one!
Tuna Melts: Tuna sandwiches with cheese warmed in the pie irons.

Dessert Pie Iron Recipes
Monkey Bread: Couldn’t be easier or messier or more popular with the kiddos. Bring a can of crescent roll dough and a gallon sized ziplock bag with about 1cup of cinnamon sugar. You’ll rip up the dough and form small balls, then toss them in the cinnamon sugar bag to coat them. Don’t overcrowd them in the pie irons unless you like your monkey bread doughy. Tip: Season the pie irons very well or your monkey bread will get stuck!
Fruit Pie: Crescent roll dough forms the shell around canned pie filling. Apple and cherry work really well.
Lemon Meringue Pie: A slight twist on the fruit pie–use lemon pie filling with 1-2 regular marshmallows or several mini marshmallows.
Stuffed pound cake: Use thin slices of pound cake as the shell around sliced strawberries, pie filling, or chocolate.


