Photoshop Friday: Week #7 – Fixing Under-Eye Circles
Apr 18, 2008
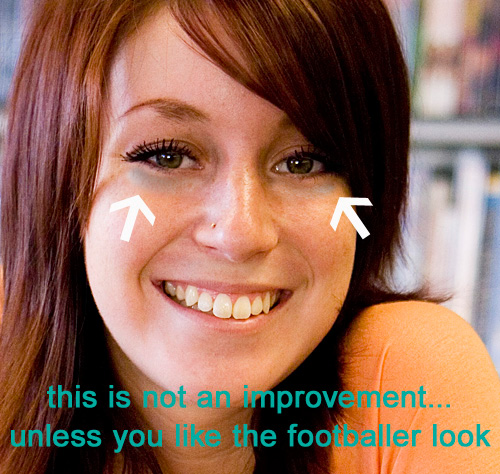
Here’s the final edited picture that I’m using today (from a Colorado Springs high school senior portrait shoot–thanks Ashleigh for being the model today)!

Here is the SOOC version (stands for “straight out of camera” with no adjustments):

The healing brush in Photoshop is often turned to when skin correction is needed. However, I sort of hate the healing brush. It certainly has its uses, but many times the blemish or under-eye circles are near dark areas of the photo (like hair) and it turns the skin grey.

The way around that is my preferred method of spot correcting skin, and that’s to use the clone tool on a separate layer, and then knock back the opacity.
Here are the step by step instructions:
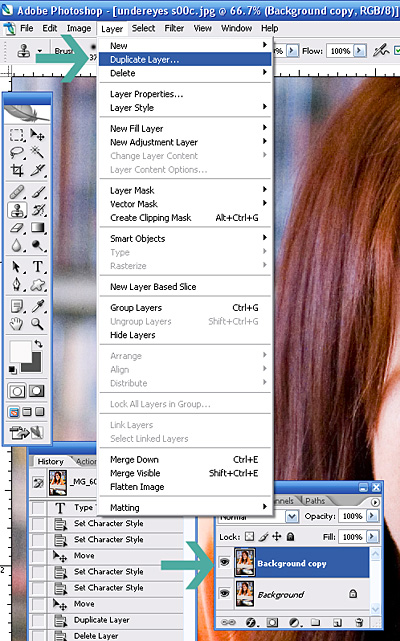
With your photo open, go to LAYERS>DUPLICATE LAYER.

With that top layer selected, use the cloning tool at 50% softness, sample an area directly below the under eye circles (by holding down the control key and clicking on the sample area), and then paint over the darkness.

Then adjust the opacity on that top layer to make it all blend together. This method is great because it leaves a little of the lines/darkness so that your subject will recognize themselves, but just see a newer, better rested self.

Posted in Photoshop Tips, Senior Portrait Photographer


Comments
Me again-tried it and it's awesome!!!! Works like magic. Thanks again for sharing this awesome tip.
Rachel Dallaire Apr 18, 2008 at 12:52Thanks so much for sharing this tip! It's something that I've been trying to find a good solution for, and you just gave it. Awesome!! Thanks again.