intro-post

Real Photography closed in December 2014 and is no longer accepting clients.

Thank you for your support over the years! Please follow me at my new personal blog: www.needlesandapen.com to keep up with my latest photography, craft, and nursing school adventures.

Scrapbook Saturdays

Mar 22, 2008

Here is recent project and one from Christmas. (The benefit of not sharing these for the past few months is that I have tons of older projects I can sneak in here during my not-so-productive weeks.) :)

Will got a 3 ft tall giraffe from my grandmother for his birthday (best present ever, Koko), and loved it so much that he brought it to bed with him.
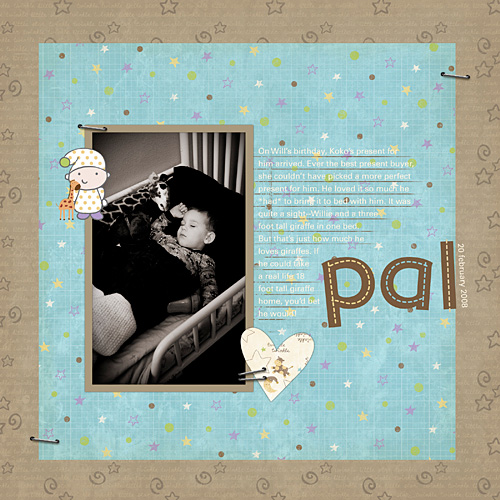
scrapbook layout photo

(Layout template from Katie Pertiet’s Valentine Mini Book 2 Pack, patterned paper from her Winky, Blinky, and Nod kit, and little giraffe sticker is from the jungle gym kit at Designer Digitals.)
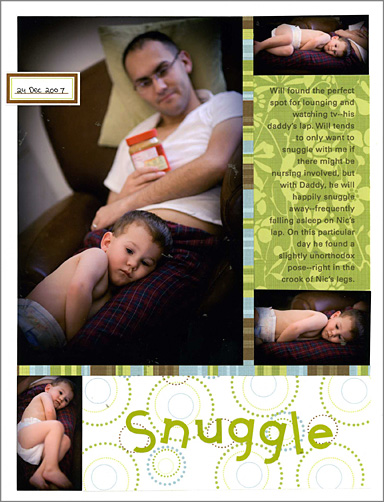
layout

(A good ole paper layout. Patterned paper from Scenic Route.)

I had plans to share more, but messing with the blog ate up my morning and now I’m off to photograph a newborn. Hurray for squishy new babies!

Posted in CraftsScrapbook

I’ll be making some improvements to the blog this weekend. If things look weird, broken, ugly, or overwhelmingly orange, it’s temporary.

(Update: Saturday @ 11am — the basic overall structure seems to be all better.  We’ll be making a few changes to the slideshow up top and maybe a few other changes, but most of it is done, so let me know what you think!  Do you like the size, is it loading quickly enough, etc?)

Photoshop Friday is up.

Posted in News

One of the first things I wanted to do when I was a brand new photoshop newbie was make a border around my photos.

The thing about photoshop, is that there are as many ways to get an end result as there are people. Of course, all of those ways are not created equal, and my very first way was absolutely awful.

Want to waste time and lose a little bit of your photo when making a border? Do what I did and use the line tool to make four lines and then put them around the edge of your photo.

It took me a few days to figure out a better way: the “canvas size” way.

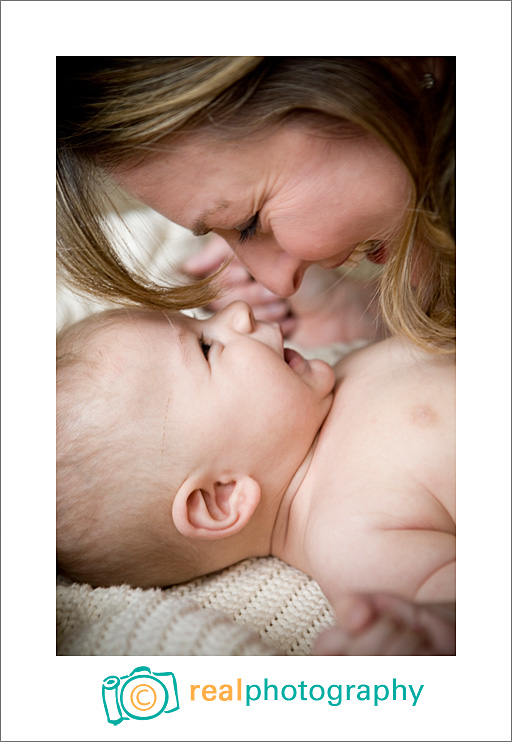
1. Open a photo. In this case, we’re going to open one of my faves from my recent session with baby Eli:

portrait of mother and baby

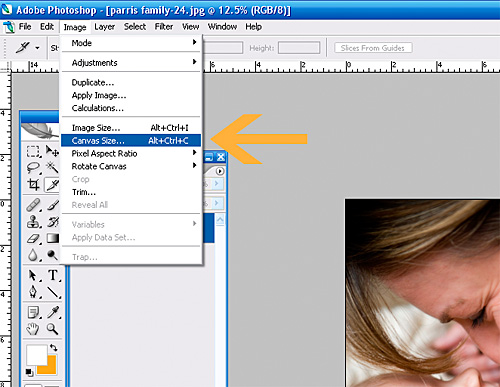
2. Go to IMAGE>CANVAS SIZE.

canvas size menu photoshop screenshot

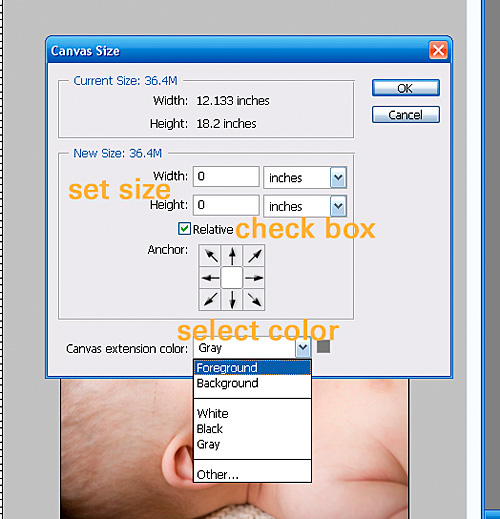
3. In the pop-up menu, select your border color (you get to choose from white, black, grey, your foreground color (in this case, brown) or your background color (in this case, orange–both the foreground and background colors are seen in your tools window) .

4. Check the “relative” box.

5. Enter the size of your border.

canvas size menu photoshop screenshot

And there you have it. Simple and fast! If you want to create a double border (like the white border with thin gray border I used), you just do this process twice.

Posted in Baby PhotographerPhotoshop Tips