This is the dress so nice I made it twice. In both a true and not so true sense.
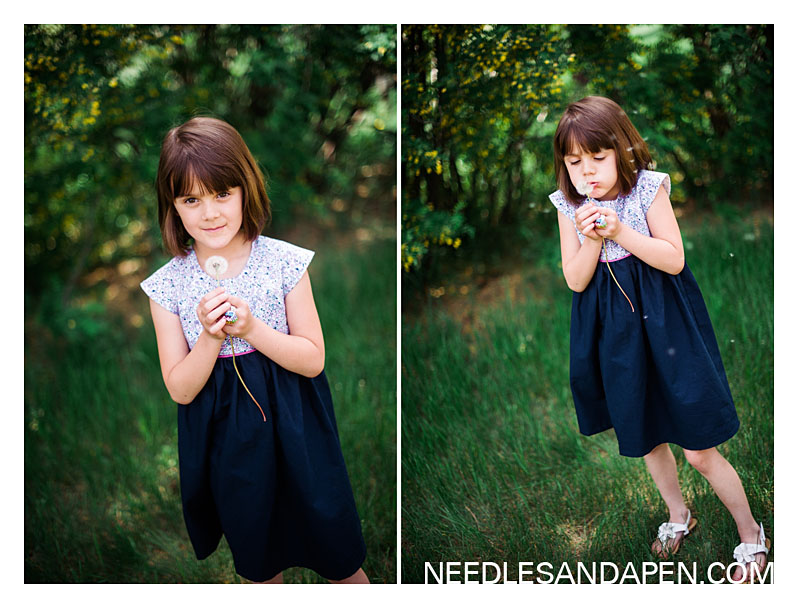
I loved Ellie’s first Geranium, so I decided to make another one as a top. As I added the skirt to the bodice it seemed short, but I trusted the pattern and carried on.
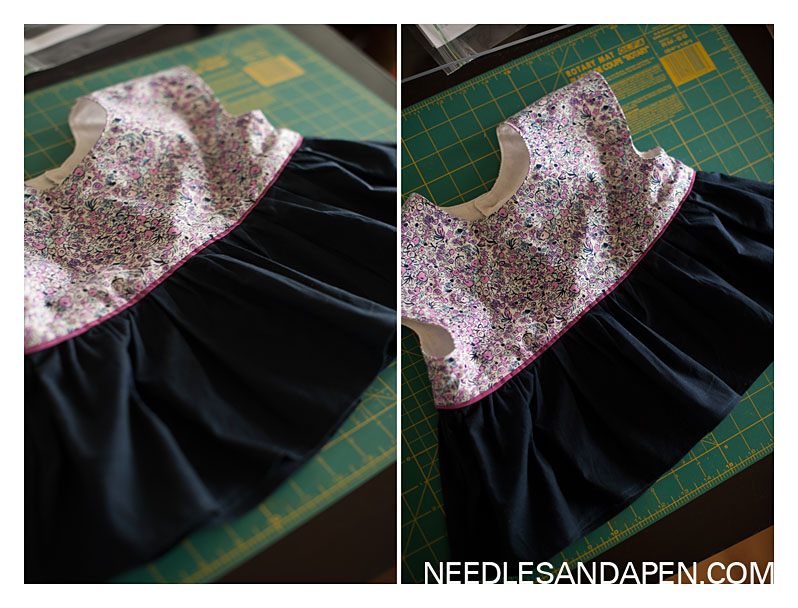
All was good until I tried it on Ellie and it was too short by several inches. I double checked with the pattern and sure enough, I’d cut it correctly. I think the pattern is too short by about 3 inches. Not wanting to mess around and figure out just how short it was, and figuring that one piece dressing is easier anyway, I ripped out the skirt and cut and sewed in a new, dress version skirt.
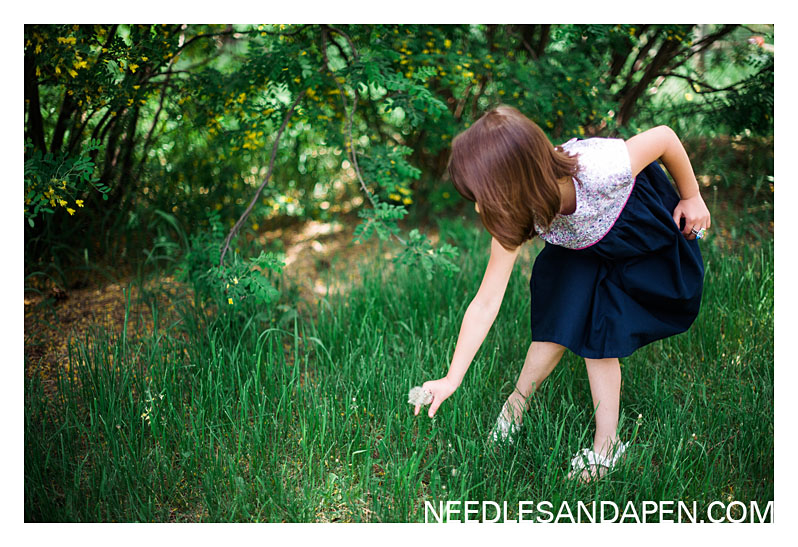
Resewing is always depressing, but I’m glad I pressed on. I love this dress with the addition of piping. I used Rae’s tutorial and it was great. It added more hassle than I expected, but it is worth it–that little bit of extra pop makes it all work.

The fabric, as with the last Geranium dress, is from Sarah Jane’s Out to Sea line. With twin girls getting Ellie’s hand-me-downs I’m now inclined to make sure I make something to coordinate with whatever the first item I make!

We visited Dinosaur Ridge and nearby Triceratops Trail last 4th of July weekend and it was amazing. While neither of these are really ‘hikes,’ they are Super Educational and Awesome Walks well worth checking out with your kids.
Dinosaur Ridge is a two mile out-and-back paved former road. It was a ROAD until they realized that THERE ARE SUPER COOL DINOSAUR TRACKS HERE NEXT TO A ROAD! Some sections are accessible for touching/climbing, with others set aside for preservation, which I think is very helpful to kids. It’s one thing to look at a dinosaur footprint, and another to get to put your own hand on it.
Pros: Unique opportunity to see dinosaur tracks, bulges, and some meh fossils. GREAT signs along the way. Opportunity to walk up to the hogback and see over to the amphitheater. (It was really important to Ellie that we walk up to the top of the hogback–she didn’t understand the point of a hike if you didn’t get the top of SOMETHING.)
Cons: Exposed walk on asphalt, so bring water and sunscreen even though this isn’t really a ‘hike.’
Distance/Difficulty: At two miles with minimal elevation gain, this is accessible for even novice little hikers. (So accessible, in fact, that Ellie, who had managed to get into the car in tennis shoes without socks, didn’t have any foot trouble.)
Directions: Dinosaur Ridge is easy to find to the west of the Alameda Parkway / C470 intersection.
Trail Teaching:
- The whole point of this one is learning! The signs along the way are great, but I also really liked the two books we got at the gift shop (which have gone missing at the moment or I’d tell you their titles).
- The little museum at the trailhead isn’t great, but it’s cheap and a good way to orient the kids to what you’re about to learn.
- This is an amazing crash course in Colorado geology that will have you looking at your other hikes differently.
Resources: The official Dinosaur Ridge website has all the info you could need! Also check out the nearby Triceratops Trail to make it a great fossil-style day!
Photos:


Triceratops Trail is perfectly partnered with Dinosaur Ridge. If you can only visit one, Dinosaur Ridge is the easy choice, but Triceratops Trail adds more obviously foot shaped bulges as well as plant impressions and even raindrops to your experience. Triceratops Trail earned its name because one of the footprint bulges is possibly from a T Rex. They are locked behind a little cage to prevent theft/damage.
We were visiting on the 4th of July weekend, which ended up being a fun time to visit, because Golden had a street fair going on. Dinner in Golden afterward combined with the street fair made it a memorable day for the kids!
Pros: Less crowded than Dinosaur Ridge, and I thought the raindrops were amazing.
Cons: Paid parking. If you visit in 2016/2017 the bike path that takes you from the parking lot to the trail is closed, so you’ll want to see this website for directions. http://www.dinoridge.org/tritrail.html
Distance/Difficulty: 1.5 miles round trip, largely flat.
Directions: Park at the paid parking lots on the southeast side of the 19th Street and 6th Avenue intersection in Golden.
Trail Teaching:
- Triceratops Trail shows much younger footprints/impressions than Dinosaur Ridge. Triceratops Trail gives a peek into life 68 million years ago versus Dinosaur Ridge’s 100 million year history.
- While there are not as many signs as on Dinosaur Ridge, there are still educational plaques to help you learn about the imprints and bulges you’ll see.
Photos:

There are a lot of raglan top patterns out there, and the Lane Raglan by Hey June Handmade is one that gets a lot of rave reviews. Having made two Lindens, I was interested to see how the Lane pattern differed. While the Linden pattern is made to be a boxy sweatshirt, the Lane reglan is more form fitting, with a curve to the waist.

I think I suck at measuring myself, because my high bust measured even bigger than a size large, but I stuck with the large, which is lucky, because it’s a little big. I had intended to go up a size from my measurement since I was using a french terry (with a decent amount of stretch, but still a slightly thicker fabric), but instinct told me a large would be big enough. Next time (and there will be a next time soon) I want to try a medium with the full bust adjustment and possibly graded to the large at the hips (I’m swimming in this a little in the shoulders and the waist could be a bit more tapered). For a working muslin, though, the large worked well enough.
I got the fabric at Jo-Ann’s this spring and it is great! It was a great bargain on sale with a coupon, but sadly I haven’t seen it there since.
The pattern instructions are great. Putting the pattern pieces together is a pain (you will print approximately 8 million pages), and you have to trim the borders off each single page, but I’m over my angst about that now that the top is made. I read a few comments on various blogs about possible neckband sizing issues, either it being too big or too small, but the pattern recommendation for the neckband worked perfectly for me–I wouldn’t want it any more or less stretched. My only questioning moment was when I went to attach the sleeves to the front and back bodice pieces. While the front and back bodice arm scythe (am I using that term correctly here?) sections are curved, the sleeves are straight, so they have to be pinned in to make the curve work. Maybe that’s common with knit raglan tops? Would love to know more if anyone knows the answer to that one!

I thought that the shirt would benefit from topstitching to hold down the neckband seam, but that ended up not looking great. Ripping that out was a huge pain!!


We checked out this new to us hike last weekend and were thrilled to discover that the dirt road to the trailhead is in fantastic shape (truthfully it was in better shape than the road to our house). While the trail itself is not well maintained, the lack of other hikers and abundance of quartz earned it favorable reviews from my crew of hikers. You begin with easy elevation gains to the top of a ridge and then traverse across it before making a rather steep descent (alarming because you know you’ll have to come back up on your way back to the car) before coming to a fork in the trail. Follow the trail to the right to continue up to Gray Back Peak. Helpful along the route to keep you on track are yellow tags. The final portion of the hike involves steepish switchbacks, but it is mercifully short. There is a little fire pit at the top.
Pros: It was a beautiful Saturday afternoon, but we only saw two other groups hiking–the solitude makes this a great hike. You cross numerous veins of quartz along the hike, so much so that we took FOREVER getting to the top because Nic and the kids kept stopping and looking for rocks. For that reason I renamed this hike Quartz Mountain.
Cons: The first section of the trail is in really rough shape and deeply rutted out. There are also many downed trees to cross. While the dirt Old Stage Road getting to the trailhead is in excellent condition and accessible (at least at the moment) but any vehicle, it is 6.6 miles up the slow going road, making this a bit of a longer drive coming from Colorado Springs.
Distance/Difficulty: 3.9 miles, 900ft elevation gain. This is a nice moderate hike for a family with young children who are comfortable hiking.
Directions: This is an easy one to get to if you are a frequent zoo visitor! Going south on Penrose Blvd take a right onto Old Stage Road. Follow it for 6.6 miles (it begins paved but turns into a well maintained dirt road) before taking a left onto FR 371 with a sign for the Ranch at Emerald Valley. After 1/2 mile you’ll see a sign for a Horse Trail. This is the trailhead. There are two trails visible here, take the one that heads uphill!
Trail teaching:
- National forests – As a hike inside Pike National Forest, this represents an opportunity to explain National Forests and how they differ from National Parks. The part the kids will most care about is that in National Forest, you can take the cool rocks home! Rocks that would be off limits to collect in a National Park are yours for the harvesting in National Forests. You can explain that with permits, people can cut down trees in National Forest land (if your kids are used to more conversation style rules, this might be peak their interest). According to Wikipedia, The Land of Many Uses (I love those signs–(a) it’s an awesome slogan and (b) the National Forest Service has the best font of any government organization I have ever seen) comprises of 155 separate National Forests across the US comprising almost 190 million acres (put together that’s about the size of Texas) or 8.5% of the total land area of the US.
- Quartz – Since you will run across a ton of quartz on the trail, now is a good time to brush up your quartz knowledge. Don’t tell them that it is the most common mineral in the Earth’s continental crust, though, since that ruins its specialness. 😛 It is found in many igneous, metamorphic, AND sedimentary rocks. Most quartz is formed when magma crystallizes. Along this hike you’ll mainly see milky quartz, with the white color caused by gas or liquid trapped inside the crystal during its formation. Its relative hardness/resistance to weathering is what makes it so abundant on mountaintop hikes–it is left behind when the softer rock wears away. (Another great quartz summary is here.)
Photos:


(Disclaimer: this post contains affiliate links.)
Last spring I took my first Craftsy class, Pattern Drafting From Ready to Wear. I was completely thrilled with the class. I’m not normally a video tutorial person–in fact, I’ve resisted Craftsy for years because I thought the format wouldn’t work for me. I like to move at my own pace and typically am frustrated with videos that go too slowly over the concepts I know and then speed over the things I don’t know. I also hated the idea of sitting in front of a screen for hours when I could be DOING something. But once I tried it, I was hooked. The classes I have tried have been wonderfully paced and I have learned so many things that I haven’t seen anywhere else. It’s really helped my clothing sewing and I wholeheartedly recommend checking Craftsy out! To see if you like the format, they even have a bunch of free mini classes. My recommendation would be the free zipper class.
For me, I found that watching the classes in the same way that I watch regular TV is very helpful–which is to say, while doing other things. Folding laundry, doing dishes, or sewing an unrelated project, I was able to watch the lessons without feeling like I was ‘losing time’ to the class.
Pattern Drafting From Ready to Wear was well paced and easy to follow and I was excited to try out the techniques using a top I’d found at Bass Pro Shop where I liked the fit, but didn’t like the pattern. For my wearable muslin, I used a knit with a lot of stretch that I got from Fabric.com years and years ago.

Drafting the pattern was easy, thanks to the class, and I felt confident using the techniques. For the pin board, I used a yoga matt I happened to have around the house. Everything went together smoothly, although I ended up waiting to hem the tank for months until I got my coverstitch machine because I really hated using the twin needle on my sewing machine for the neckline and armholes.
I would use a less thick binding next time (using a raw edge on the wrong side of the shirt versus encasing the binding completely. I was being very critical of my wonky stitches until I noticed that the store bought tank had even worse stitching!! It made me look more critically at the clothing in my closet and prompted the realization that I am WAY too hard on my own sewing projects–the clothes in my closet from stores are full of ‘mistakes’ that I’ve never noticed since I never turned a critical eye to them!


When I finished the binding on the neckline and armholes I panicked a little because it was very distorted and weird looking (no pics because of the panic). I did some looking online and noticed that for many people working with knits, the moment of ‘ta da!’ is one of similar ‘oh no!’ and the key is to wash and/or iron it after you’ve finished sewing to make it all even out. That helped a bunch.
My final finished tank is a meh. The fabric I chose stretches a lot, which pulls the armholes down much farther than the original shirt. The neckline is also a little wonky even after washing/ironing which I think is in part due to that big fat binding. BUT the good news is that the actual pattern drafting was a success and the techniques I learned from the class were solid and I feel confident that I could tweak the fabric/binding to make the pattern work if I want to try this tank again.

My next class will be Custom Fitting: Back, Neck, and Shoulders. I often have issues with the fit of the shoulder of shirts–the sleeves always begin before my shoulder has ended, so I’m excited to learn some techniques to fix that on clothing I make myself!
|

















Heather Henne - You’re so good to us 🙂 luckiest twins ever!