Needles and a Pen » Knitting, Sewing, and Nursing School

Masthead header
Needles and a Pen bio picture
  • Welcome to my blog!

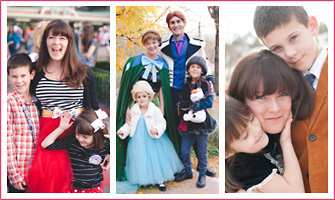
    Hi! I'm Traci. I'm a Registered Nurse who loves quilting, knitting, cross stitch, and the great outdoors. In my pre-scrubs life, I owned Real Photography, and you can still see my old wedding and portrait photography site here .

    I've created a map that shows links to our camping/hiking/general family fun review posts that you can find here. It's pretty much the coolest thing on this site. Thanks, Google!

    I great big puffy heart *love* comments, so please let me know you visited! I try to always reply!

It’s from God. It says “Leave God Alone.

Will ‘reading’ the note in our church welcome basket. 

I’m pretty sure that’s from the New(er) Testament in the Book of William.  The fuller reading is something along the lines of “Leave God Alone.  He’s sick of you and all your ‘problems.’ Go bother someone else.”  [In reality, this seemed to be part of Will’s ongoing scheme to convince Nic and I that “we don’t go to church anymore.”  ]

saw this when I got to school today.  🙂  His old school did a fantastic job of teaching him how to write his name!

saw this when I got to school today.  🙂  His old school did a fantastic job of teaching him how to write his name!

tutorial : temporary applique using fusible web

Today was ‘purple day’ at preschool, but Will has nothing purple in his wardrobe. I didn’t feel like buying a purple shirt just for the occasion, and I didn’t want to ruin any of his shirts by permanently altering them in a purple way.  Fusible web applique to the rescue!
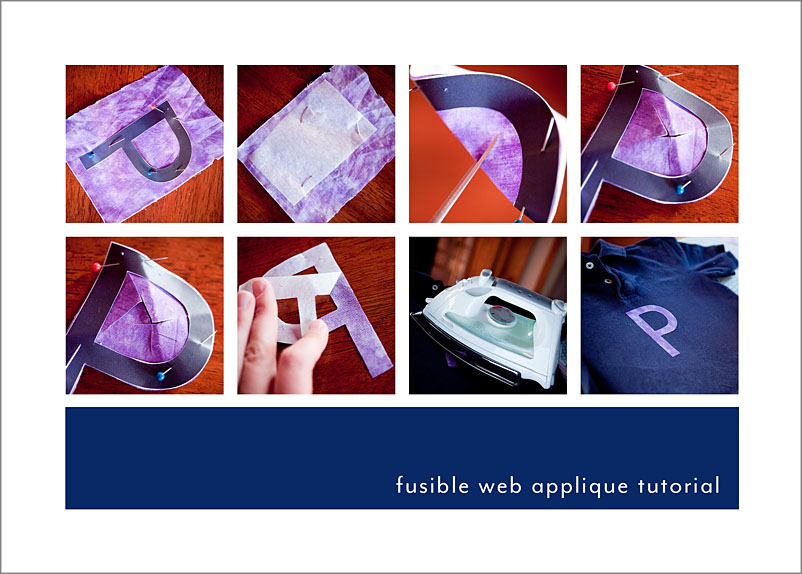
Step 1:  Cut out the shape you want to use on scratch paper as a template.  I usually print out something I’ve made in photoshop.

Step 2:  Get some scrap fabric and cut out a piece of fusible web applique a little larger than your shape.  Iron the fusible web to the WRONG side of the fabric you’ll be using.

Step 3:  Pin the template to the RIGHT side of the fabric you’re using.  (Pictures 1 and 2 show what it will look like after this step.)

Step 4:  Cut out your fabric shape.  If you have negative space, the easiest thing to do is to fold it in half and make a cut into the fabric (photo 3).  Then use that cut to make lots of other cuts (photo 4 and 5).  This will make cutting out those curves a lot easier.

Step 5:  Unpin the template and pull the paper cover off the back of the fusible web (photo 6).

Step 6:  Place it on your shirt and iron (photo 7).  Voila (photo 8)!

This is also the same technique that I use for all of Ellie’s monthly pictures:

Daniela - LOVE the technique you used for your daughters monthly pics. You are very talented!

MK - How do you remove it? Does it leave a mark behind?

Will loves to play the abracadabra game with Ellie and his blankie.  Ellie loves to play ANY game with Will.

Will loves to play the abracadabra game with Ellie and his blankie.  Ellie loves to play ANY game with Will.