Remember this dream on quilt top? When I finished it at the end of October, autumn was coming on strong and I decided to set it aside until working with the spring colors felt right again. The design is based off a quilt that I saw on flickr (which of course I can’t find the link to now–sorry), and that quilt had added sashing to this quilt design from Film in the Fridge.
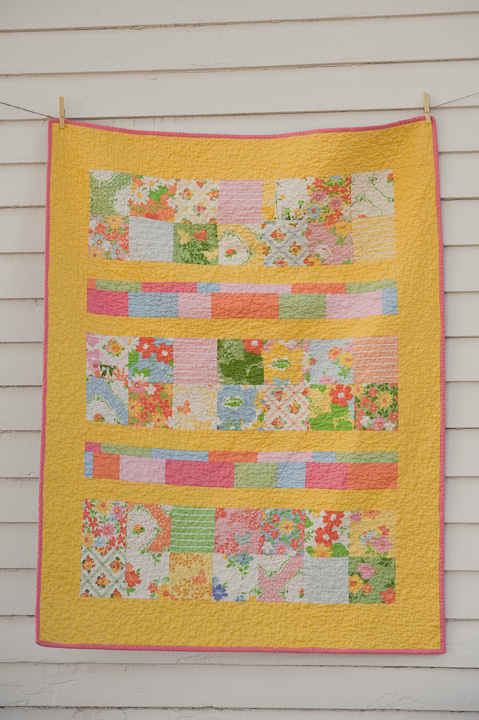 On Saturday I took a long arm quilting class with my friend Melissa. In order to make the course more family friendly we did all three classes in one day. It was a lot of fun and so incredible to see how danged hard following a pantograph is! We tried, but, dude…we sucked. Badly. I mean, it was SHOCKING. We were both relieved that we didn’t want to follow pantographs, because if we had, we would have been very disappointed! The good news was that after a break for lunch we got to try our hand at free motion quilting and we both had a lot of fun. We found some fun new patterns that I can’t wait to try on a full scale quilt. For the very last portion of the class, we got to load our own quilts and spend some time quilting them. I wanted to finish this during my practice time (about 1 hour to load, unload, and quilt, which translates to about 30-40 minutes of actual quilting time, and add plenty of tension adjustments and issues within that small window), so instead of going with one of the newer free motion patterns, I went with one I knew I’d be able to breeze through–a basic meander. It paid off, because I was able to finish the quilt (and went over the allotted time by just 3 minutes)!
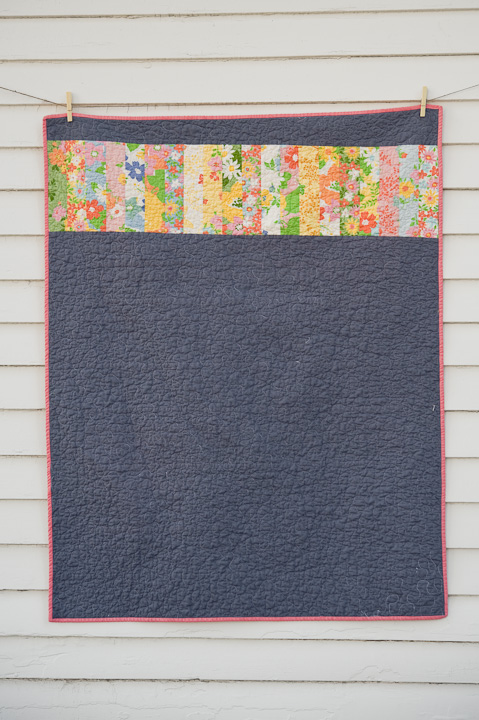 I learned an important lesson about lining up a pieced back on the quilting frame. It’s best to have the pieced section running parallel to the frame so that you can line it up perfectly…as you can see here, my pieced section slopes down toward the right side and because I’d had it perpendicular to the quilting frame, I had no idea until I got it all trimmed up at the very end (it’s also made more obvious by the fact that the pieced section is about 6″ higher than I’d intended, too).
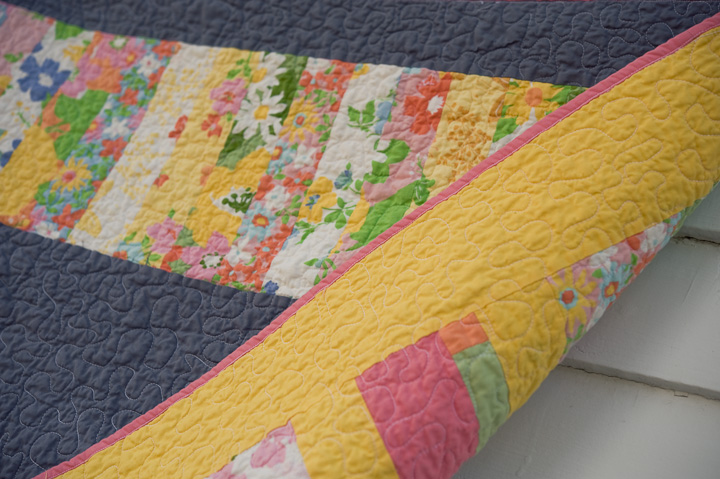 When I got home I wanted to finish it up right away, and since I’m already working on hand stitching binding on a much larger quilt, I decided to give the machine method another go. I had planned on binding the quilt in blue, but didn’t have enough scraps left over, and I’m so glad–I absolutely love the pink binding (Kona melon). I think it looks particularly pretty on the gray side (making me once again regret not going with the gray sashing as I’d first intended). I used up a dream on charm pack for the top, but got a layer cake for the back and have plenty of that left over so maybe I can try another version of this quilt next spring!
 My second attempt at machine stitching the binding was more successful than my first attempt on Will’s car quilt, but I think it’s worth the extra effort to hand stitch the binding for a totally clean look on the back side.

I’m excited to have such a bright spring quilt to add to the living room quilt rotation!












Jolene - Well, I totally lOVE the yellow solid with Dream On. I think I’m going to use similar colors for my Dream On JellyRoll. I’m fascinated by long arm quilting machines as well. Maybe someday…
Marci Girl - I think it turned out fabulous, even if the back is a little off! I just bought a charm pack of dream on, and now I’m super psyched to get working on something with it! Good job!
Julia - Hi Tracey,
Do you do the top stitching free hand on the machine, or is there a pattern for that? It looks so uniform, I remain incredibly impressed by your talent and designs!
Julia - And sorry, I just butchered the spelling of your name!
Melissa - You rock! I love it! I love the pink binding a whole bunch. And I think the machine binding looks great, too!
Sandra in WA - The sloping pieced area on the back? That is what I like to refer to as an “unintended design element”!
I think this looks beautiful. I’m glad you chose the yellow for the front. It looks perfect.