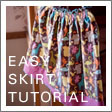
For Ellie’s first day of school I knew I wanted her to have something with this adorable Heather Ross print from the Kinder line. I decided on a circle skirt and while I had made circle skirts just by the numbers before, I’ve never been 100% happy with the waistband and decided to try out the Tilly Circle Skirt pattern from The Simple Pattern Company The pattern is made for non-directional fabric, but it was easy to change for directional fabric, and this technique will work for any circle skirt pattern.

How to use the Tilly Circle Skirt Pattern with directional fabric (tips for an intermediate sewer):
- Print out and cut the pattern per the instructions.
- Fold the pattern piece in half. Originally the pattern piece shows you 1/4 of the skirt. Your piece will now be 1/8 the size of your final skirt. The original pattern makes a skirt that is one piece of fabric–yours will have 8 individually cut panels to ensure they are all right side up.
- Instead of folding the fabric and cutting one single circle, you will cut 8 panel pieces. Since you will have seam allowances on each side where the original pattern had none, you’ll want to add 1/4″ to each side of your panels. (You can eyeball this or trace out a new pattern piece depending on your level of Sewing Type A-ness.) If you wanted to you could fold your fabric selvage to selvage and cut two pieces at a time but I was being picky about which parts of this fabric I wanted to make sure were showing, so I fussy cut each individual panel.
- Sew the 8 panels together to form a circle, then proceed with the original pattern instructions.

I really loved the Tilly Circle Skirt pattern waistband. Placing the elastic only on the back half of the waistband and using three different channels gave it a much more Ready to Wear look than my previous circle skirt attempts. Yes you can follow a free circle skirt tutorial online and run the math yourself, but the great waistband option in this pattern made it worth the money in my book!


