When I started free motion stitching I was desperately looking around online for some kind of tutorial to accomplish the modern embroidery look I was going for with my sewing machine. I wasn’t able to find much (though admittedly it’s hard to search for something that doesn’t really have an official name).
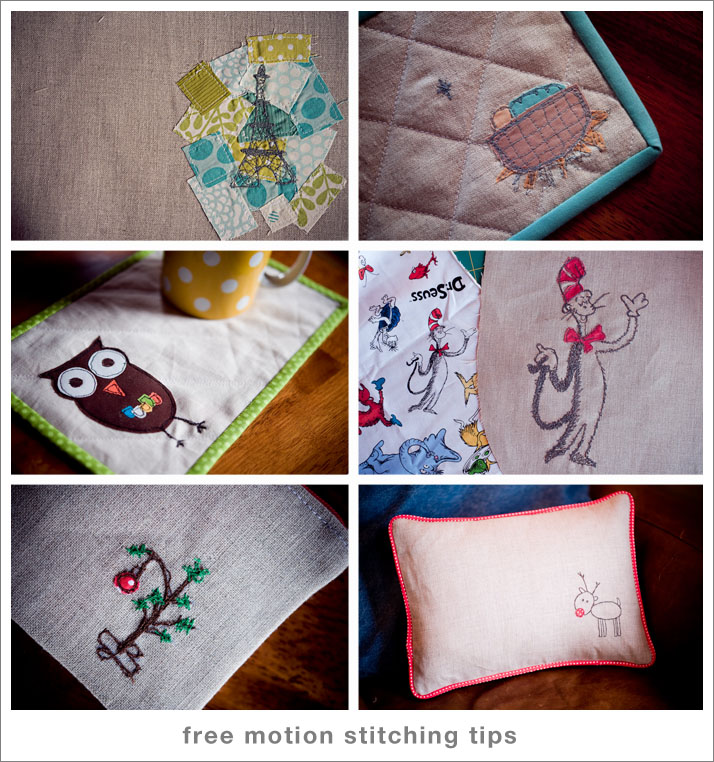
To me it falls under the umbrellas of thread painting, machine embroidery, machine applique, and just the general banner of free motion stitching. So if anyone out there is googling for how in the heck to accomplish it, I’ve got a few tips and instructions. First of all:
1) Get your machine set up. This is your first hurdle, and unfortunately, it’s the one that’s least universal. Your machine might not even be capable of doing free motion stitching/quilting. If you still have your manual, first pat yourself on the back for knowing where it is. Then see if there is a section that covers free motion quilting and follow those directions. Not sure if your machine is up for it? Here’s what you need: (a) the ability to drop your feed dogs (the ridges below your pressure foot that move the fabric back toward the needle) and (b) a free motion quilting or a darning foot (in some machine brands, this foot has a giant spring). Depending on your machine, you may also have a special setting for your pressure foot when you free motion stitch/quilt. On my Pfaff there’s the usual up or down position for the pressure foot, but there’s also a third half-way position. This half-way position is what you’ll use for free motion quilting and stitching.
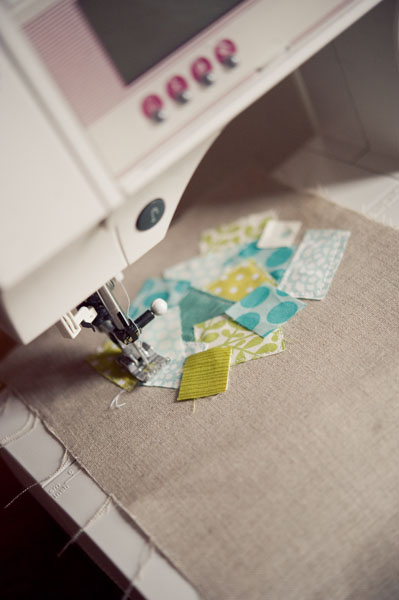
Once the mechanics of it are set up, you may have to do some tweaking with your tension and stitch length. For me, I set the stitch length to zero and then I have to lower my tension down to around 3. Grab a big piece of scrap fabric and start stitching. (Remembering that you are the one moving the fabric around.) This photo shows a regular pressure foot, not the free motion stitching one. Sorry–I got lazy and pulled a photo I had already of my machine hard at work. 😛
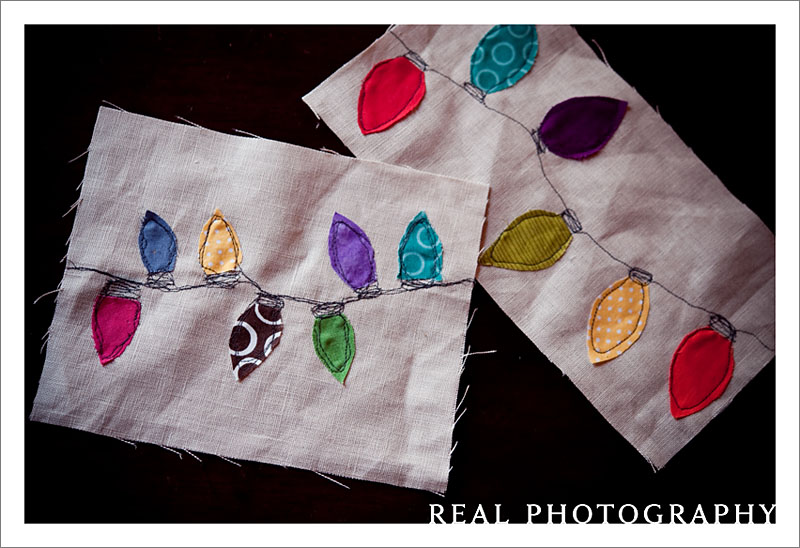
2) Practice to find your groove. Through practice you’ll find the right speed for your machine and the right speed for you to move your hands. This is not something that will feel comfortable the first day you try it. Just keep coming back to it. For this reason I recommend diving right into a few actual projects that excite you (once you get the machine set up and your tension looks good). When I started free motion quilting I quickly realized that it was going to take a lot more then a couple of minutes with a scrap ‘quilt sandwich’ to get decent at it. Realistically I was never going to set aside hours to just practice (I was never one for scales on the piano). 😛 So I used quilting Will’s car quilt as my practice. He doesn’t care about the mistakes, and I was motivated to keep ‘practicing’ by stitching to finish the quilt! Here are my first two practices at free motion applique/stitching:
3) Starch your fabric like a military uniform (ie- starch it to within an inch of its life). I use linen, which I love the look of, but it flops all over the place because of the loose weave. I have tried stabilizers, but I don’t like having to pick them all off afterward. So I get starch happy instead.
Here are some tips that I’ve picked up from my last couple of projects:
– Pick a sketchy design. Designs that are intended to look like rough sketches lend themselves perfectly to free motion stitching. My first time around I don’t worry if it looks a little weird in spots–because that’s just the base line. I am going to go around at least one (usually more like two) times, and it will all even out. The first time around a part of me always wants to panic that it looks like crap…but that’s just your outline. It will get better, and if you picked something that’s supposed to look like a sketch, you’ll be trying to create a few stitches that are outside the line.

– Use glue instead of fusible web. I’ve used fusible web to attach the fabric, and I’ve used a glue stick, and I prefer the fabric glue stick. I like the way the fabric frays with the glue stick better than the tiny frays you get after you wash it with fusible web. I also don’t like how stiff it is (I feel like it’s mean to my sewing machine–this is stupid, but if you’re going to be spending a few hours going around and around the same 9 inches of fabric, you want the sewing to feel smooth and not punch-y).
– If you are doing a design with some outlining and a few bits of fabric as accents, add the fabric after your base outline is done. I find this less stressful.

– None of those transfer papers or chalk markers come off as easily as advertised. (I also tend to lay down a pretty heavy line.) Since I don’t intend to wash all of these projects, I use a dry paint brush to get the markings off.
If you make something with this tutorial, I’d love to see it! Please link it up!








Kelly - I’m in LOVE with my pillow… thanks SO much! It’s just sheer perfection! 🙂
Susanne - I have a “Mark-B-Gone” marker that is AMAZING. You just need a damp cloth and the marks disappear!
Great tutorial!!
Christie, Describe Happy - Great tutorial and great timing. Last night was the first time I set myself up and gave this a go. I think overall it was a success and I know what you mean about feeling weird about it, but it started to feel more natural toward the end. Good tips about checking stitch size and tension… I may tweak mine based on your suggestions! I am definetly book marking this to refer back to! Your cat in the hat is adorable by the way!
Meagan - Thank you so much!!! I can’t wait to try it!
Mom - You have got talent, girlie! Can’t wait to try it! Your Dad is also very impressed!
Susie - I think these are fantastic- I have no idea what you’re talking about, but it’s worth a shot to try!
Thanks, Traci!
Janimal - OH my! That Cat in the Hat is free motiong stitching? Amazing! I have tried a little bit of free motion stitching and I can’t imagine the control you must have for a design like that. Color me impressed!
Madeline - These tips are wonderful! I made a bag for my mom 6 months ago with some free motion quilting on it and I LOVE the look of it but I just haven’t had the time to try it out again. You have inspired me though. The Eiffel Tower stitching is seriously AMAZING! I think I need that on a bag or something similar for myself! Thank you for clarifying all this for me!
Linda - Thanks for sharing the tips. I saw your Eiffel Tower some time ago on Flickr and didn’t realize you had posted this until a fellow guild member directed us to it. I am definitely going to try it. So so cool.
Marglow - For me the hardest part was learning the things about my machine that aren’t in the manual- kind of a heartbreaking nightmare! But now, its soooo fun! Love that there are NO rules- make your own.
wendy - I tried this for the first time yesterday, it was brilliant fun! I couldn’t believe how good the results were and I can’t draw at all!
Carolyn - Happy Dance! (I hate it when people say that)… but just found this tutorial. I haven’t read through it yet, but I just thought I’d mention that it’s cool. Yes, I’m a dork. My husband is putting the kids to bed, so I have some free time, and maybe I’m just too excited.
My friend does free motion sewing too. I’m going to tell her about your site. Here is some of her stuff…
http://sisterhipster.blogspot.com/2010/12/introducing-sister-hipster-hoop-art.html
Dolores - Hi
I’m really keen to try this out. Dumb question but do you mean a fabric glue stick or your basic UHU?
Thanks
Dolores - Thanks for getting back to me. Another question: when you say starch do you mean the old fashioned stuff you put in the wash OR the spray-on stuff you use when you iron?
Deb - Thank you so much for this tutorial. I am sure that it will help me finish the recycling of a oven mitt that the outer fabric was falling apart on. I took it apart at the seams then took of the rest of the outer fabric. Using jean material I wanted to sew it in a box type quilting pattern. But I really sucked at the free hand sewing. Now I know why & what to do. I enjoyed the rest of your site also especially the kitchen towel project which is how I got to your site in the first place. Thanks again, Deb